The Charm of Lightweight Photography: Capturing Moments in the Mountains
The charm of hiking lies in its purity—dialogue between footsteps and nature, without the need for complicated equipment. Similarly, photography can be simple and beautiful. Modern smartphone lens technology has advanced by leaps and bounds, with pixels often reaching tens of millions, complemented by AI optimization, sufficient to handle most outdoor scenes. Lightweight cameras like the Sony ZV-1 or GoPro are known for their compactness and versatility, making them suitable for long-distance carrying. The advantage of these devices is that they free up your hands, allowing you to focus on the rhythm of hiking while quickly capturing images when inspiration strikes.
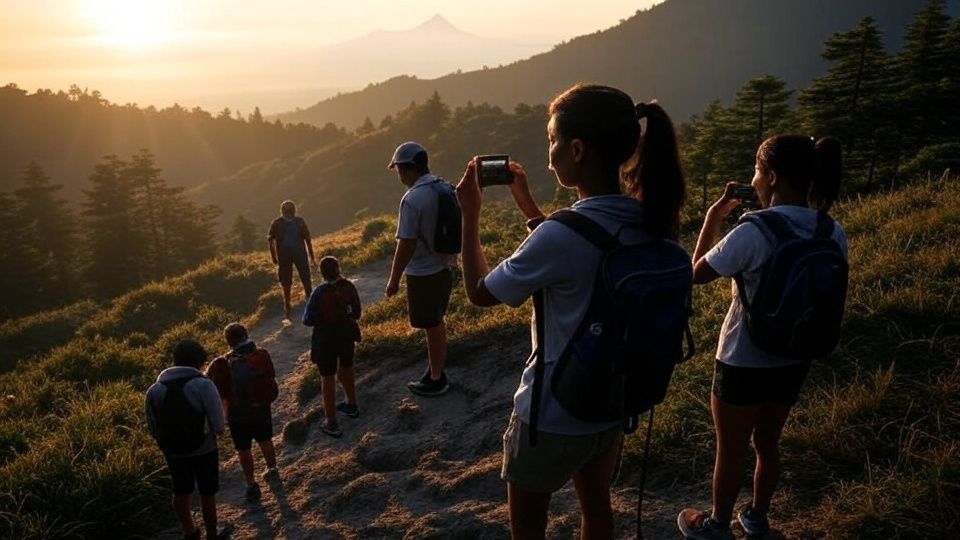
Imagine you are climbing a peak shrouded in mist, with sunlight pouring through the gaps in the clouds, forming a golden beam. In this moment, you don’t need to spend time adjusting complicated camera settings; just take out your phone, tap the screen, and you can freeze this moment of light and shadow. The essence of lightweight photography lies in its immediacy, allowing you to focus on the experience rather than technical details. Of course, mastering some basic skills is crucial to make your photos stand out.
The Magic of Light and Shadow: Chasing Natural Light in the Mountains
The light and shadow in the mountains are the soul of photography. The soft light of dawn, the warm colors of dusk, or the harsh light of noon can impart different emotions to photos. While hiking, paying attention to changes in light is the first step. Dawn and dusk are referred to by photographers as the "golden hours," when the light is gentle, shadows are elongated, and they can add depth and drama to mountain scenes. For example, photographing distant peaks in the morning mist will soften details and create a dreamy atmosphere; while at dusk, capturing the silhouette of a hiker against the backlight can outline a powerful profile.
To capture light and shadow, try to observe the direction of the light. Front lighting can present clear details, suitable for photographing streams or vegetation in the valley; backlighting excels at outlining contours, ideal for capturing ridges or human silhouettes. Side lighting can emphasize the texture of the terrain, making the quality of rocks or tree trunks more prominent. For instance, when walking on a rugged mountain path, the rocks under side lighting will cast long shadows, and these shadows themselves become elements of composition, adding layers to the photo.
When shooting with a smartphone, you can use HDR (High Dynamic Range) mode to balance light and dark areas, especially in scenes with strong contrast, such as sunlit slopes and shaded forests. Many smartphones have built-in HDR functions that automatically process the image, preventing highlights from being overexposed and shadows from losing detail. If using a lightweight camera, try manually adjusting the exposure compensation; slightly underexposing can preserve details in the sky and add depth to the image.
The Art of Composition: Making Mountain Scenes More Storytelling
Composition is the language of photography; good composition can make an ordinary mountain scene captivating. While hiking, the scenery in the mountains changes dramatically, and how to tell a story within a limited frame tests your observational skills. Here are a few composition techniques that can make your photos more appealing.
First, make good use of the "rule of thirds." Divide the frame into a grid of nine squares in your mind, placing the subject (such as a peak, tree, or hiker) at the intersection of the lines or along the lines to create a more balanced image. For example, when photographing a solitary peak, placing it one-third of the way from the right side of the frame leaves space on the left for the sky or distant scenery, making the image feel more expansive. Many camera apps on smartphones have a built-in grid line feature that can help you quickly position your subject.
Secondly, use contrast between foreground and background. Mountain scenes often have rich layers; the foreground can be a cluster of wildflowers, a rock, or a winding path, while the background can be distant mountains or a sea of clouds. This sense of layering can guide the viewer's gaze from the foreground into the background, making them feel immersed in the scene. For example, when photographing a path leading to the mountain top, using the path as the foreground and letting it wind into the distance towards the peak creates a composition that has both direction and a sense of exploration.
Additionally, framing composition is a secret weapon in mountain photography. Using branches, rock crevices, or caves as natural frames to enclose the subject can make the image more focused. For instance, photographing a distant peak through gaps in the leaves not only highlights the subject but also adds a sense of peeking into nature. This technique is especially useful in smartphone photography, as the wide-angle lens can easily capture expansive scenes.
Finally, don’t forget to include people. Hiking photography is not just about recording landscapes; it’s also about documenting the journey of people. A small hiker's figure standing in a vast mountain scene can instantly make the photo full of storytelling. Try to have companions stand at the edge of the frame or in the distance, with their backs to the camera, gazing into the distance; this composition can convey feelings of solitude, exploration, or awe.
Documenting Route Details: Making Photos a Map
Hiking is not only a visual feast but also a journey full of details. From the signposts at intersections to the moss on rocks, from the sound of rushing streams to the victorious cheers at the summit, these details weave together a complete hiking story. Through photography, you can stitch these fragments into a vivid route map.
First, photograph key route markers. Whether it’s a wooden sign, spray-painted path markers, or stone piles, these are the "nodes" of the route. When photographing, ensure the markers are clear and recognizable while retaining some background details, such as surrounding trees or terrain, to help you recall the route later. For example, when photographing a sign at a fork in the road, try to place the sign in the center of the frame and slightly zoom out to include the surrounding environment, making the photo both practical and aesthetically pleasing.
Secondly, capture changes in terrain. Hiking routes often include diverse landforms—gravel slopes, forest paths, valleys, or meadows. These landforms are not only visual highlights but also important features of the route. When photographing, try to use a wide-angle lens to showcase the entire landscape or use macro mode to focus on details, such as the patterns on rocks or dew on wildflowers. The wide-angle mode on smartphones is particularly suitable for capturing expansive valleys, while macro mode can capture the delicate beauty of moss or insects.
Additionally, document changes in weather and environment. The weather in the mountains can change rapidly; mist, clouds, or sudden showers can add a unique atmosphere to photos. For example, when thick fog envelops the trail, photographing a blurred tree shadow can convey the mystery of the moment. These photos are not only artistic creations but also help you recall the challenges and emotions of the route.
To make the photos more systematic, it is recommended to set a shooting plan before hiking. For example, photograph a landmark or scenery every hour, or take a representative photo at each important point (such as rest stops or summits). This way, when you review the photos, they will resemble a pictorial diary, fully restoring the context of the journey.
Post-Processing: Adding Soul to Photos
Shooting is just the first step; appropriate post-processing can make photos more impactful. Mobile applications like Snapseed, Lightroom Mobile, or VSCO offer simple yet powerful editing features, suitable for hikers to adjust photos on the go. Adjusting brightness, contrast, and saturation can make the colors of mountain scenes more vivid; appropriately cropping the image can enhance composition. For example, if the sky in the photo is too monotonous, you can slightly increase the contrast to make the texture of the clouds stand out.
When handling light and shadow, try to preserve the natural texture. Overly saturated colors or exaggerated filters may distort the photo, masking the original beauty of the mountain scene. In contrast, slightly increasing the brightness of shadow areas can make details in the dark parts clearer, especially in silhouette photos taken against backlight. Additionally, using curve tools to fine-tune tones can add a cinematic feel to the photo, giving the light and shadow in the mountains more depth.
Practical Advice: Travel Light, Capture the Real
The essence of hiking photography lies in ease and authenticity. Carrying too much equipment may leave you exhausted and cause you to miss the beauty in front of you. Therefore, choose a powerful smartphone or a lightweight camera, paired with a sturdy mini tripod or phone holder, to handle most scenes. While shooting, maintain keen observation, always paying attention to the interaction of light and shadow, terrain, and people. Don’t strive too hard for a perfect image—sometimes, a slightly flawed photo can convey the most genuine emotions.
Additionally, remember to protect your equipment. The mountain environment can be unpredictable, and a waterproof camera bag or phone case can prevent accidental damage. If using a smartphone for photography, ensure the battery is sufficient or carry a lightweight power bank. To save space, consider multifunctional accessories, such as trekking poles with phone holder functions, allowing you to switch between hiking and shooting modes at any time.
Weaving Memories with Photos
Hiking is a dialogue with nature, and photography is the notebook of this dialogue. Each photo resonates with the light and shadow of the mountains, a symphony of footsteps and heartbeats. Through simple composition techniques, keen observation of light and shadow, and documentation of route details, you can capture your hiking story with a smartphone or lightweight camera. When you flip through these photos, the silhouettes in the mountains will once again awaken the passion of your trek, as if you are standing on the peak once more, facing the wind, gazing into the endless distance.